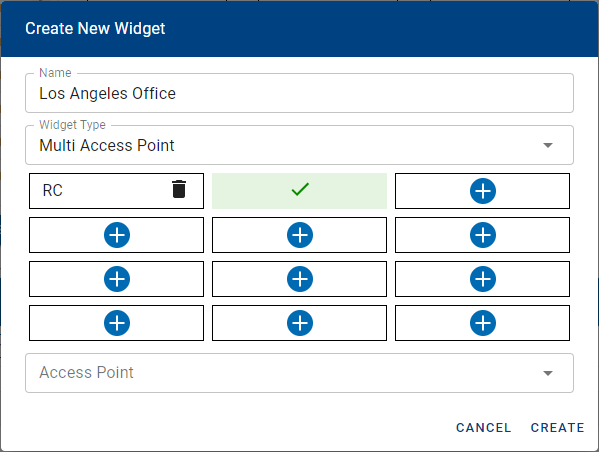
To manage up to 12 readers at once, you can use a “Multiple Access Point” widget. Unlike the Single Access Point widget, this will not show history events.
- Click
on one of the three Placeholder Widget panels.
- Alternately, hover over
and then choose Create Widget.
- Alternately, hover over
- Enter a name for the widget, and then choose Multiple Access Point from the drop-down menu.
- The screen will change to show a grid of Access Points. To add an Access Point to one of the boxes, click
, and then choose the Access Point from the drop-down box.
- Continue adding other desired Access Points to the grid.
- If you want to delete an Access Point from the grid, click
next to that Access Point.
- If you want to edit which Access Point is in a box, click on it and then select the Access Point from the drop-down box.
- If you want to delete an Access Point from the grid, click
- When you are done setting up the grid, click
.
You can also control any of the Access Points in the widget by clicking on the individual Access Point and then using the drop-down box and 
Last modified:
26 February 2021


 on one of the three Placeholder Widget panels.

 next to that Access Point.
 .
.